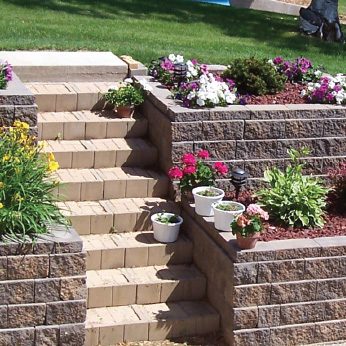
Retaining walls keep landscape soil from eroding and help with the aesthetic appeal of a beautifully landscaped area. A retaining wall is a beautiful feature and can create more usable space in a yard. Building a retaining wall is a straightforward project that offers many benefits.
1. Call-in locates
Dial 811 and request to have the area where the retaining wall is being proposed marked for all underground utilities. Remember private utilities will not be marked. Such as electric service, water, or gas lines to a detached building or propane tank.
2. Plan your Location
Using a tap measure, decide the length and width of your retaining wall. Mark the area with garden stakes, and a mason’s line. Ensure the string is the desired height of the wall you’re building and level. If you want the wall to be curved, use paint to mark the shape and location of the wall.
3. Dig a Trench and Level the Ground
The success of your retaining wall depends on a level base. To create that foundation, dig a trench for the first course of your wall. Ensure the ground remains even throughout and compacted.
The trench should be deep enough to bury at least half the height of your first course of block (we recommend using something like KINGS-wall) as they sit on a 4-6-inch base of gravel. In addition, the trench should be twice as wide as a single block. Once the trench is dug, compact it with a hand tamper and place a 2x4 in the trench to ensure the bottom is smooth and level.
4. Lay the Base
To help with erosion, your retaining wall should be built on a solid foundation of gravel. Choose gravel that is between ½” and ¾” and fill the trench with 4-6 inches of gravel. Use a rake to distribute the gravel and use a hand tamp or plate compactor to ensure it’s compacted.
5. Lay the First Course of Block
It’s time to start laying the block on the sturdy base you’ve created. Position your first block and use a standard level to ensure it’s level from front to back and side to side. Then, continue laying your first course of block checking to ensure each block is level. After your first course is finished, fill the space between our retaining wall and landscape with gravel.
6. Lay additional Courses
Continue laying the block as you did with the first course, ensuring it’s level as you go.
7. Backfill the Wall
Once you’ve laid your desired number of courses of block, you can fill in the area behind the wall with gravel or sand. Backfill up until slightly below the height of the wall and fill the remaining space with sod or topsoil.
As always, we recommend contacting experienced and knowledgeable team at Midland Concrete Products. We will ensure you have what you need to build the right retaining wall for your needs.